Escape Room Game - Setup the Project for Occulus

 Setup the Project for Oculus


Follow this to setup my Unity Project for Oculus

Get Started with Meta Quest Development in Unity - this is a series of articles that shows you how to setup your project for the Oculus Quest. Some of the specific articles that I followed include:
After following the steps above my project was able to be built and run on the Oculus. However, I still needed to be able to move around the scene. In order to do that, I did the following:

Unity and Oculus Meta Quest - Lesson 01 Setting up Tutorial - this is a series of videos that shows how to develop for the Oculus in Unity.

Unity and Oculus Meta Quest 2 Tutorial 05 - Moving your player - this is a short video from that same series that shows you how to create an object that represents the player (OVRPlayerController) with the camera attached (OVRCameraRig) and then hook up the left and right hand controls. After this, you are able to walk around your scene and move the camera view just like you can in other Oculus games you are familiar with. I think I still need to hook this up to an object that can be seen in the game, like an avatar, or some other object so that other players can see me in a multiplayer game.


Things I did initially before I found the above series on youtube and the documentation on from Meta


Go to Edit -> Project Settings


Scroll down to the XR Plug-in Management section on the left and select the Android tab on the right (You can see the little Android robot icon)


Uncheck OpenXR and then check Oculus


Click the X in the top right of the window to save your changes and exit


Follow the steps on this page to build your project for Oculus:


After following those steps, it still didn't load for me on the Oculus. I'm not certain that the following steps fixed this for me, but after doing this (in addition to the steps above) and clicking Build and Run, then it loaded on the Oculus for me.

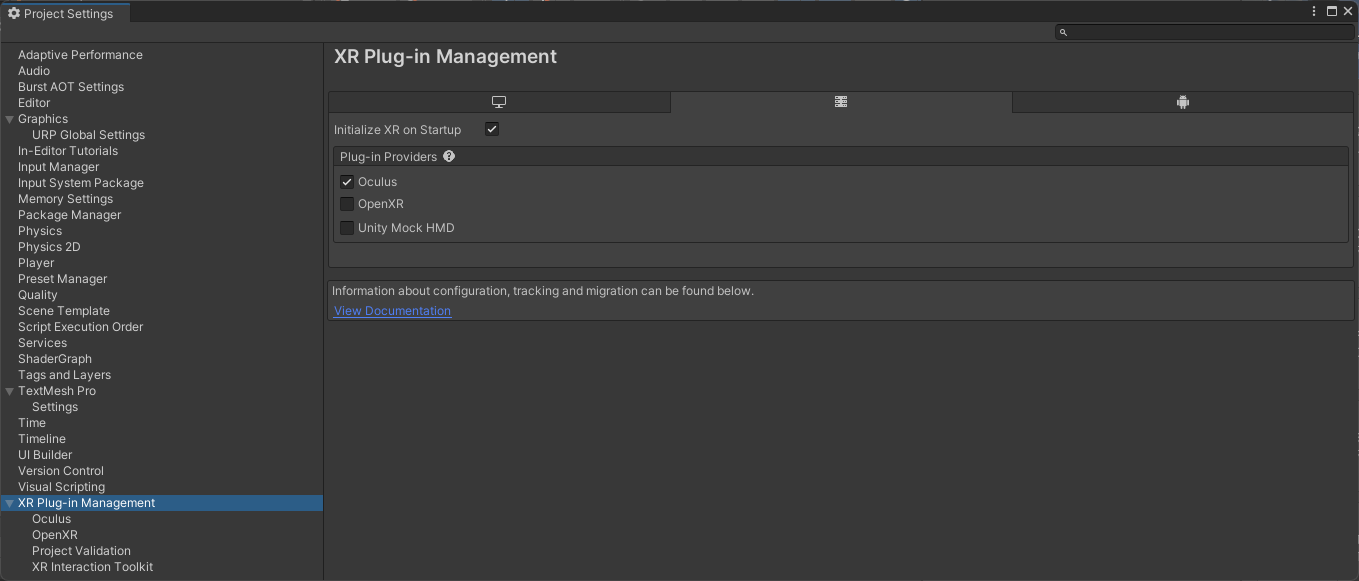
Go to Edit -> Project Settings -> XR Plug-In Management (Same as before)

Go to the Windows, Mac, Linux Settings tab and make sure the Oculus option was checked
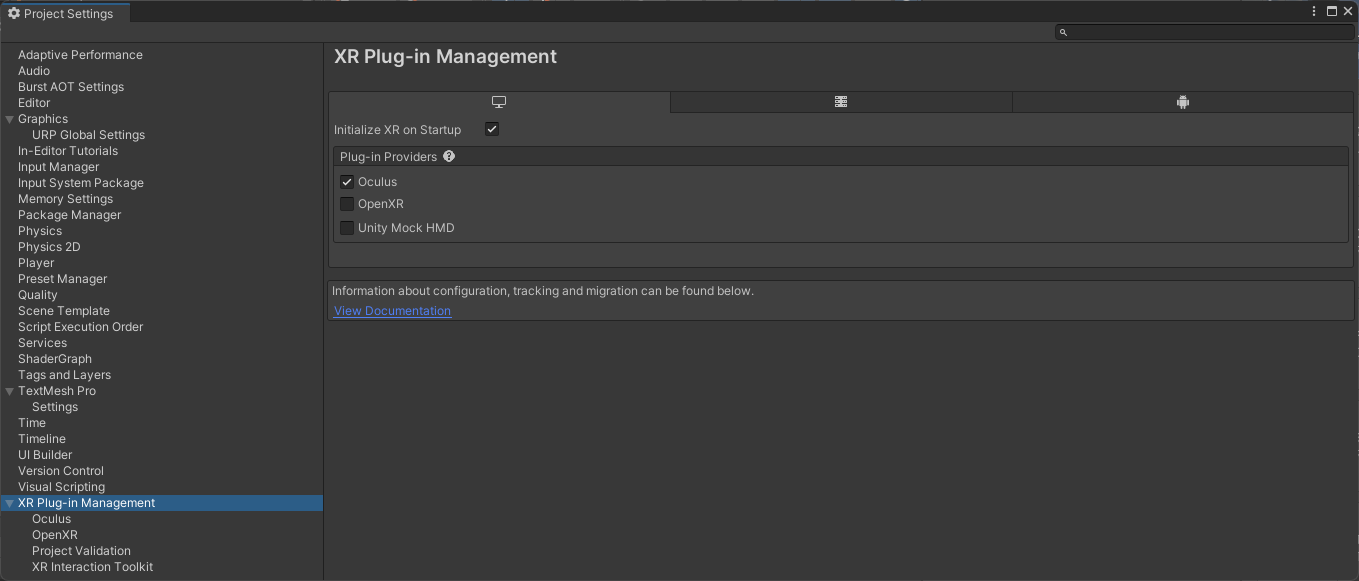

Go to the Dedicated Server Settings tab and make sure the Oculus option was checked

Go to File -> Build Settings -> Build and Run (again)


Confirm the game is loaded on the Oculus

If the game did not start immediately, then you can start it yourself

On the Oculus, Go to the Applications screen

Make sure the Unknown Sources option is selected in the dropdown menu at the top right. The All option will not show your game. Only the Unknown Sources option will.

Click your game to start it.


Escape Room Game - Publish the Initial Project

 Publish the Initial Project

Click the Publish repository button


Check the Keep this code private button and click Publish repository


Go to github and confirm the repository was published successfully


Escape Room Game - Initialize the Repository for Git

Initialize the Repository for Git


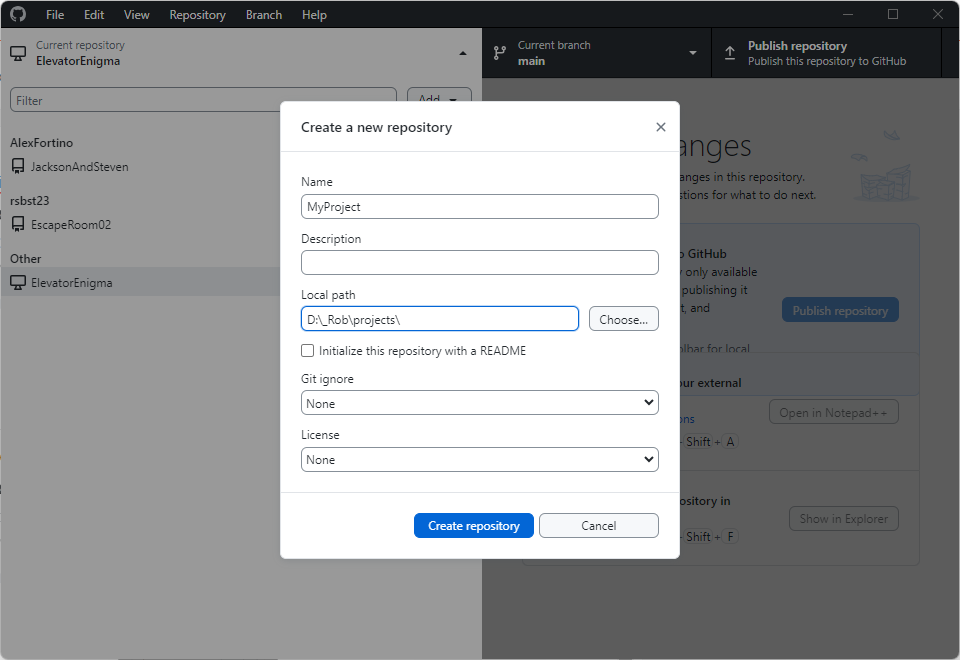
Open Github Desktop and Expand Current Repository


Click Add -> Create new repository...


Enter the name of the repository

Set the Local path (note, after clicking Create repository, the repository will be created under the selected folder, so if you already have a project select one level higher and set the repository Name the same as the folder)


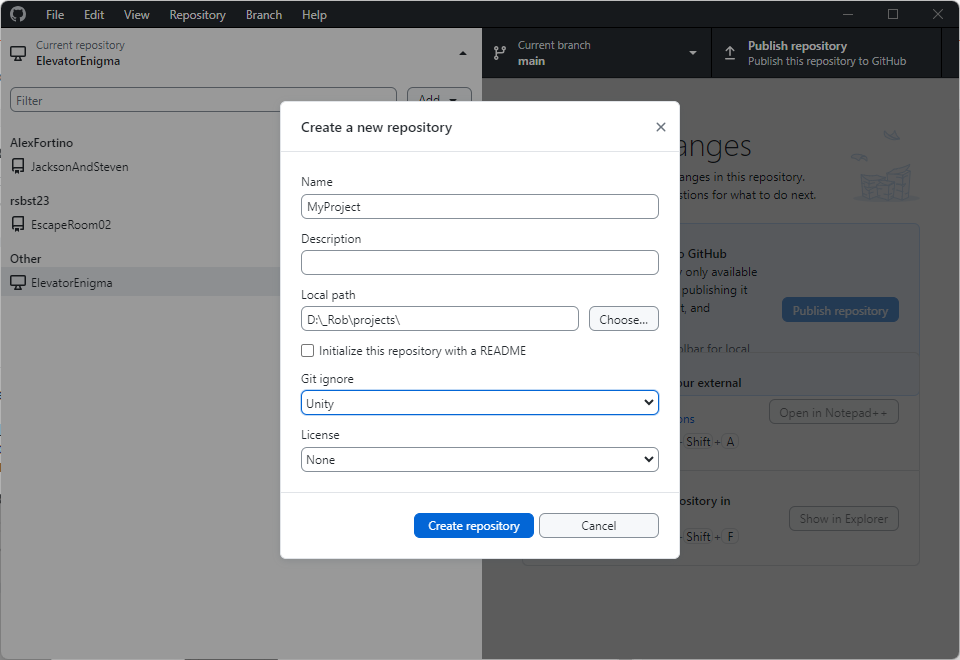
Set the Git ignore file to Unity


Click Create repository

The repository should now be initialized. If you go to the project folder in Windows Explorer, you will se the .git directory along with other git files such as the .gitignore file.


Escape Room Game - Create a new Project in Unity

Create a new Project in Unity


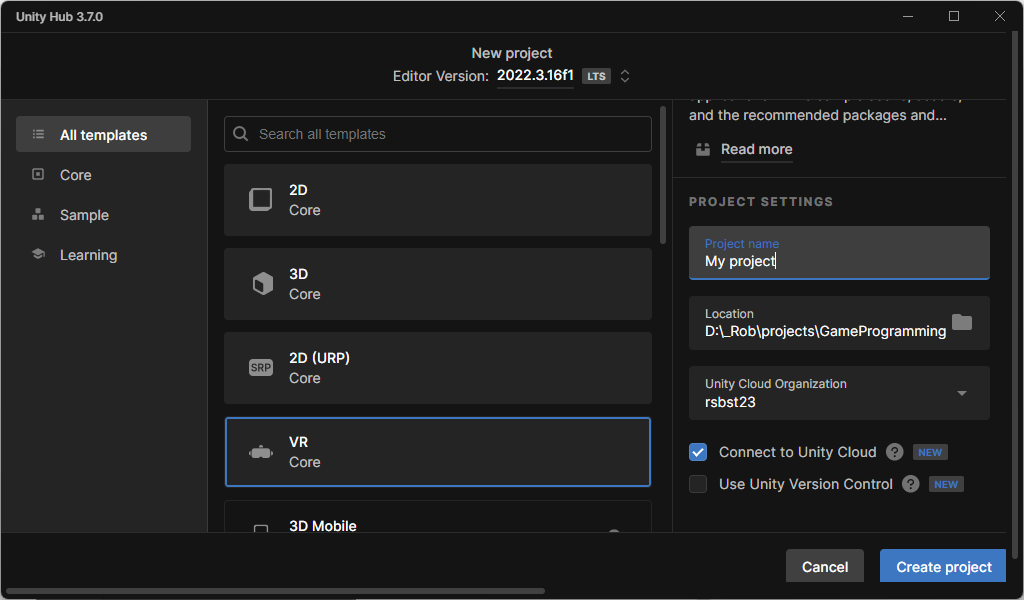
 Got to Unity Hub and click New Project


Select VR Core


Set Project name

Select the Location to save the game

Set the Unity Cloud Organization

Check Connect to Unity Cloud

Click Create Project


Building an Escape Room Game

Building an Escape Room Game for Oculus

  1. Add a project in Jira
  2. Create a story for initial setup
  3. Install Unity
  4. Create a new Project in Unity
  5. Initialize the Repository for Git
  6. Publish the Initial Project
  7. Create a new branch for the rest of the initial setup
  8. Setup the Project for Oculus
  9. Install ProBulder
  10. Install ProGrid
  11. Create a Lobby scene
  12. Add Photon
  13. Add a Player Character (Meta Avatar)

General errors

Preload of http://localhost/UIStatic8/applications/build/test-all.js has failed
Preload of http://localhost/UIStatic8/libraries/diff_match_patch/diff_match_patch.js has failed
Preload of http://localhost/UIStatic8/libraries/mark/8.11.1/mark.js has failed
Preload of http://localhost/UIStatic8/libraries/aspera/3.7.0/asperaweb-4.min.js has failed
Preload of http://localhost/UIStatic8/applications/ext/build/classic/theme-crisp/theme-crisp-debug.js has failed
Preload of http://localhost/UIStatic8/applications/ext/build/ext-all-debug.js has failed
Test threw an exception
ReferenceError: Ext is not defined
   at <anonymous>:1:1
   at Object.runCode (http://localhost/Ringtail.Web.UIStatic.Tests/resources/libraries/siesta/siesta-all.js:5911:28)
   at Object.override [as runCode] (http://localhost/Ringtail.Web.UIStatic.Tests/resources/libraries/siesta/siesta-all.js:817:32)
   at loadScripts (http://localhost/Ringtail.Web.UIStatic.Tests/resources/libraries/siesta/siesta-all.js:5836:36)
   at cont (http://localhost/Ringtail.Web.UIStatic.Tests/resources/libraries/siesta/siesta-all.js:5824:39)
   at HTMLScriptElement.onerror (http://localhost/Ringtail.Web.UIStatic.Tests/resources/libraries/siesta/siesta-all.js:5931:21)

  1. In IIS, select Default Web Site -> Configuration Editor -> system.webServer/serverRuntime (in the Section dropdown) -> click Unlock Section (in Actions on the right)


Redirect full URLS with Blogger and GoDaddy

I wanted to point sugaraunts.com to theottoolbox.com and I wanted the full path to resolve and point to the specific pages. For example, I wanted all of the following links on the left to take the user to the links on the right:

sugaraunts.com => https://theottoolbox.com
http://www.sugaraunts.com => https://theottoolbox.com
http://sugaraunts.com => https://theottoolbox.com
http://www.sugaraunts.com => https://theottoolbox.com
http://www.sugaraunts.com/2016/03/intrinsic-muscle-strengthening-play.html => https://theottoolbox.com/2016/03/intrinsic-muscle-strengthening-play.html
I tried to use just GoDaddy's domain forwarding, but the best I could do with this is redirecting the user to the root domain. So full links such as:


would only take the user to:

https://www.theottoolbox.com

I wanted to take them to:

https://theottoolbox.com/2016/03/intrinsic-muscle-strengthening-play.html

In order to do this, I needed a more sophisticated forwarding mechanism, which is available if I used a hosting account. In my case, I already owned an existing hosting account on GoDaddy, so I was able to reuse that one, saving me the cost of an additional account.

So in order to do this, I did the following:

  1. Change the A record to point to the ip address of the hosted web server
  2. Setup a new folder under the existing site
  3. Add the domain to the hosted web server and pointed to the new folder
  4. Added a Web.config with a redirection rule (this was a .Net site)

1. Change the A record to point to the ip address of the hosted web server

Go to the DNS manager in GoDaddy for the sugaraunts.com domain and edit the A record to point to the ip address of the hosted webserver for propertooey (97.74.24.22). 

Note, when the sugaraunts link break, this is probably why. Godaddy will move propertooey to a different webserver and since the A record points to the old server, the links stop working. So I need to go into the sugaraunts.com domain and add a new A record or edit the existing one. The last time I changed this was on 12/1/2021 and the ip addres for propertooey's web server was 50.62.160.49

2. Go to the File Manage in GoDaddy and create a new folder at the root level called sugaraunts

3. Add the domain to the webserver and point it to the sugaraunts folder

4. Add the web.config with the fowarding rules in it.


Quick draft: 

In order to do this, I changed sugaraunts.com in the godaddy DNS manager to have its A record point to the host ip address for the propertooey webserver. In this particular instance, I just reused the propertooey host so I didn't have to pay for another one. So I made the A record value 50.62.160.49.

Then I setup a new folder under the root website called sugaraunts.

Then I added a web.config with the redirect rule in it (and pretty much only that in it). So then all requests that go to sugaraunts.com go to that directory and iis sees that all requests to this directory should be routed to https://www.theotoolbox.com/...

And vwalla, all is right with the world

To confirm that everything is working, open an incognito browser window and clear the cache. Then test all of the following links. Also test them at : http://httpstatus.io/

sugaraunts.com
www.sugaraunts.com
http://sugaraunts.com
http://www.sugaraunts.com

http://www.sugaraunts.com/2016/03/intrinsic-muscle-strengthening-play.html
} else { }